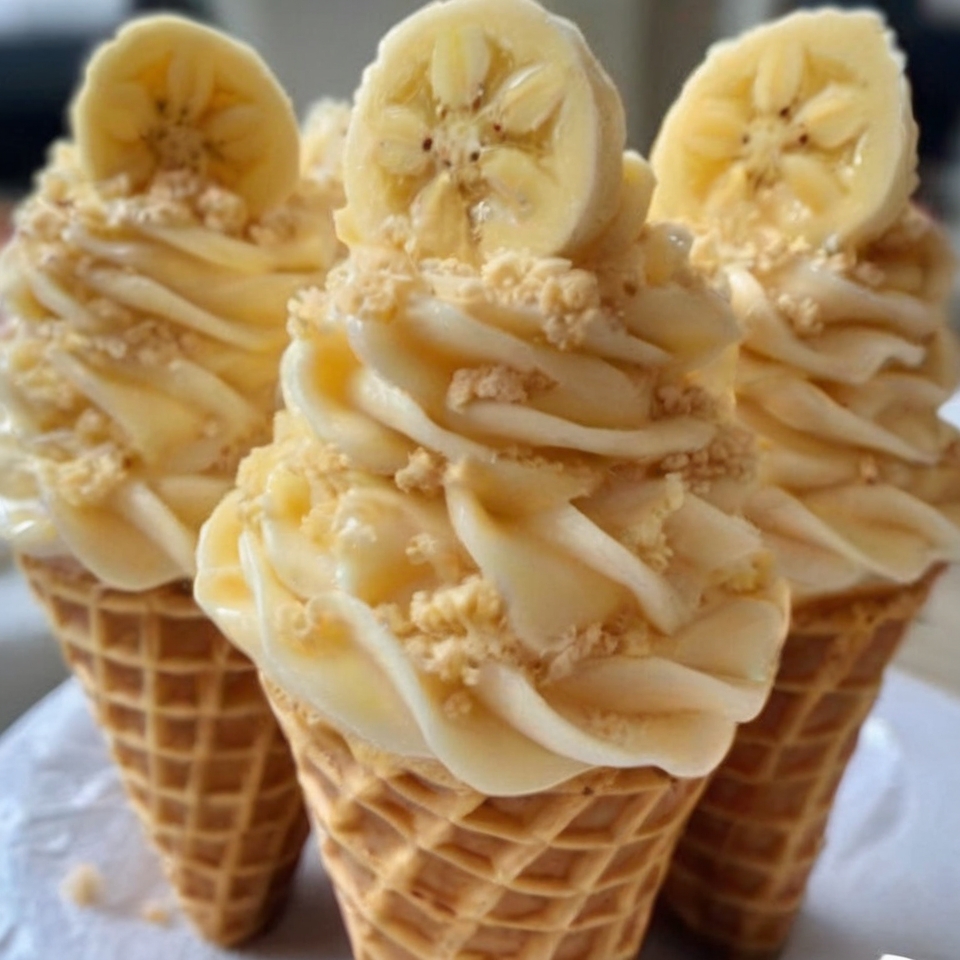
Banana Pudding Cheesecake Cones combine the nostalgic flavor of classic banana pudding with the rich creaminess of cheesecake, all served in a crisp ice‑cream cone. This playful dessert looks impressive yet is surprisingly simple to prepare, making it perfect for gatherings, celebrations, or whenever you crave a sweet treat with a little personality.
Why You Will Love This Recipe
Some desserts feel comforting from the very first bite. Banana Pudding Cheesecake Cones are exactly that kind of dessert. They bring together smooth cheesecake filling, silky homemade banana pudding, and crunchy cones that add a delightful texture. The balance between creamy and crisp creates a dessert that feels indulgent without being complicated to make. It is also a wonderful make‑ahead option for parties, and the individual cones make serving easy and fun.
Preparation and Cooking Time
Preparation time: 25 minutes
Chilling time: 1 hour
Total time: About 1 hour 25 minutes
Servings: 12 cones
Tools Needed
– Medium saucepan
– Whisk
– Mixing bowls
– Electric hand mixer or stand mixer
– Rubber spatula
– Measuring cups and spoons
– Plastic wrap
– Cups or a cone stand for holding cones upright
Ingredients
Banana Pudding
2 cups whole milk
1/2 cup granulated sugar
1/4 cup cornstarch
1/4 teaspoon salt
1 teaspoon vanilla extract
Cheesecake Filling
16 ounces full‑fat cream cheese, softened
1 cup granulated sugar
1 teaspoon vanilla extract
1 cup sour cream
1 cup heavy cream, cold
1/2 cup banana puree (about 2 ripe bananas)
1/2 cup finely crushed vanilla wafer cookies
1/2 teaspoon ground cinnamon (optional)
Assembly
12 flat‑bottom ice cream cones (cake or waffle cones)
2 fresh bananas, sliced
Whipped cream for garnish
Extra crushed vanilla wafers for garnish
Step‑by‑Step Instructions
1. Make the banana pudding
In a medium saucepan whisk together the milk, sugar, cornstarch, and salt until smooth. Cook over medium heat while whisking constantly until the mixture gently simmers and thickens enough to coat the back of a spoon. This usually takes about 5–7 minutes.
2. Add flavor
Remove the pudding from heat and stir in the vanilla extract. Transfer it to a bowl and press plastic wrap directly on the surface to prevent a skin from forming. Allow it to cool at room temperature, then refrigerate until completely chilled.
3. Prepare the cheesecake filling
In a large bowl beat the softened cream cheese, sugar, and vanilla extract for about two minutes until smooth and creamy. Add the sour cream and mix until just combined.
4. Whip the cream
In a separate chilled bowl whip the cold heavy cream until stiff peaks form.
5. Combine gently
Fold the whipped cream into the cream cheese mixture using a spatula. Add the banana puree, crushed vanilla wafers, and cinnamon if using. Mix gently until fully combined.
6. Chill the filling
Cover the mixture and refrigerate for at least 30 minutes so the texture becomes slightly firmer.
7. Assemble the cones
Place the cones upright in cups or a cone stand. Fill each cone about two‑thirds full with the cheesecake filling.
8. Add banana pudding
Top each cone with a generous spoonful of chilled banana pudding.
9. Garnish and serve
Just before serving decorate with fresh banana slices, whipped cream, and crushed vanilla wafers. Serve immediately for the best texture.
Tips for Perfect Banana Pudding Cheesecake Cones
– Whisk constantly while cooking the pudding to avoid lumps.
– Always chill both the pudding and cheesecake filling before assembling.
– Use ripe bananas for a naturally sweet flavor.
– Assemble the cones shortly before serving so they stay crisp.
Variations and Flavor Ideas
– Chocolate twist: add mini chocolate chips to the cheesecake filling.
– Caramel flavor: drizzle caramel sauce on top before serving.
– Nutty crunch: sprinkle chopped toasted pecans or walnuts for extra texture.
– Strawberry banana version: add a few diced strawberries to the filling.
Storage Tips
The banana pudding and cheesecake filling can be stored separately in airtight containers in the refrigerator for up to 3 days. For best results assemble the cones just before serving. The cones themselves should be stored in a dry container at room temperature to maintain their crisp texture.
Approximate Nutrition Per Serving
Calories: 320
Carbohydrates: 36 g
Protein: 5 g
Fat: 17 g
Sugar: 22 g
Sodium: 210 mg
Frequently Asked Questions
Can I make this dessert in advance?
Yes. Prepare the pudding and cheesecake filling up to a day ahead and store them in the refrigerator. Assemble the cones just before serving.
Can I use store‑bought pudding?
You can, but homemade pudding gives the dessert a richer flavor and smoother texture.
Can I use graham crackers instead of vanilla wafers?
Yes. Finely crushed graham crackers work well and add a slightly different but delicious flavor.
How do I keep the cones from getting soggy?
Always assemble the cones right before serving and ensure both fillings are well chilled.
Final Tip
Take a moment to enjoy the process. Desserts like Banana Pudding Cheesecake Cones are not just about sweetness; they are about the joy of creating something beautiful and sharing it with others. When the creamy filling meets the crisp cone and the fresh banana slices on top, the result feels a little special, and that is exactly what great desserts should be.