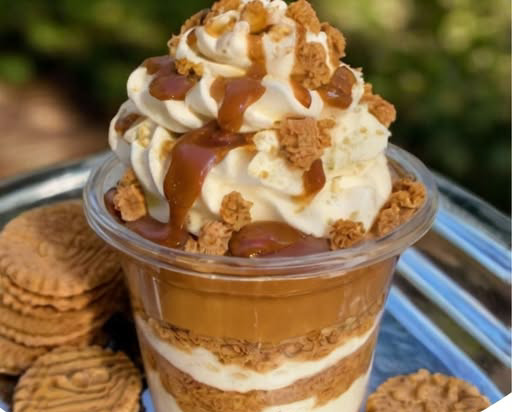
Creamy, rich, and irresistibly smooth, these Cookie Butter Cheesecake Cups are a no-bake dessert made with Biscoff spread, crushed cookies, and whipped cream. Perfect for gatherings, holidays, or when you crave something indulgent yet effortless.
Why You’ll Love These Cookie Butter Cheesecake Cups
There’s something magical about cookie butter. The moment it melts into cream cheese, it transforms into a silky, spiced cloud of flavor that feels both comforting and luxurious. These Cookie Butter Cheesecake Cups capture that feeling in every spoonful. They’re elegant enough for guests, yet simple enough to prepare on a quiet evening when you just need a little sweetness in your life. No baking, no complicated techniques — just pure dessert joy layered beautifully in individual cups.
Preparation Time
Prep Time: 20 minutes
Chilling Time: 2 hours minimum
Total Time: About 2 hours 20 minutes
Servings: 6 dessert cups
Tools You’ll Need
- Mixing bowls (2)
- Electric hand mixer or stand mixer
- Spatula
- Small dessert cups or jars
- Spoon or piping bag
- Measuring cups and spoons
Ingredients
Cheesecake Filling
- 8 oz cream cheese, softened
- ½ cup powdered sugar
- ½ cup cookie butter (Biscoff spread)
- 1 teaspoon vanilla extract
- ½ cup heavy whipping cream
Cookie Layer
- 1 cup crushed Biscoff cookies
- 2 tablespoons melted butter
Toppings
- Caramel sauce for drizzling
- Whole and crushed Biscoff cookies
- Whipped cream
Step-by-Step Instructions
- Make the Crust: Combine the crushed Biscoff cookies with melted butter until evenly coated. Spoon the mixture into small cups or jars and gently press to form a firm base. Set aside.
- Prepare the Filling: In a mixing bowl, beat the softened cream cheese, powdered sugar, cookie butter, and vanilla extract until completely smooth and creamy.
- Whip the Cream: In a separate bowl, whip the heavy cream until stiff peaks form. Carefully fold the whipped cream into the cookie butter mixture until light, airy, and fluffy.
- Assemble: Spoon or pipe the cheesecake filling over the prepared cookie base. Smooth the tops with a spatula.
- Chill: Refrigerate for at least 2 hours or overnight to allow the cheesecake cups to set properly.
- Garnish and Serve: Drizzle caramel sauce over each cup, add whipped cream, sprinkle crushed Biscoff cookies, and finish with a whole cookie on top.
Tips for Perfect Texture and Flavor
Use room-temperature cream cheese to avoid lumps and ensure a smooth filling. Do not overmix after folding in the whipped cream, as this can deflate the airy texture. For deeper flavor, slightly warm the cookie butter before mixing — it blends more easily and enhances its caramelized notes.
Delicious Variations and Additions
Add a thin layer of melted chocolate between the crust and filling for extra richness. Swirl additional cookie butter on top for a marbled finish. For a lighter version, substitute part of the cream cheese with mascarpone for a softer, more delicate texture.
Storage and Serving Advice
Store the cheesecake cups covered in the refrigerator for up to 3 days. They are best served chilled straight from the fridge. Freezing is possible for up to one month, but allow them to thaw slowly in the refrigerator before serving to preserve their creamy consistency.
Approximate Nutrition Per Serving
Calories: 420 kcal
Carbohydrates: 38g
Protein: 5g
Fat: 28g
Sugar: 24g
Frequently Asked Questions
Can I make these cheesecake cups ahead of time?
Yes. They can be prepared up to 24 hours in advance and kept refrigerated until ready to serve.
Can I use a different cookie instead of Biscoff?
Absolutely. Graham crackers or digestive biscuits work well, though the signature spiced flavor will be milder.
Why didn’t my filling set properly?
The whipped cream may not have reached stiff peaks, or the cups did not chill long enough. Allow sufficient refrigeration time for best results.
Final Thought
Desserts don’t always need to be complicated to feel special. These Cookie Butter Cheesecake Cups prove that a few quality ingredients, handled with care and a little enthusiasm, can create something unforgettable. Take your time, enjoy the process, and let every spoonful remind you why homemade desserts always taste better.